Introduction
Over the years, we have seen many big security problems that (1) people aren’t sufficiently aware of and (2) have solutions that, while effective, aren’t easy to research, understand, and/or implement fully. In our content, we like to address these.
In this instalment, we will be covering email spoofing - what it is and how to mitigate it for your domain names.
Email spoofing is the act of sending an email as someone or something without their authorisation. A prominent and very damaging example of an email spoofing and social engineering attack is spear phishing - an email sent as a known or trusted entity in order to trick the recipient into performing actions or revealing sensitive / confidential information. For example, an email sent as the external accounting firm to the internal finance manager asking for a bank transfer or an email sent as the IT department to the CEO asking for their password.
All of this is possible because email wasn’t originally created with security in mind so, by default, it is inherently insecure. That being said, there are optional countermeasures which can be configured to significantly boost the security of an email system.
Before we get started, please note the following:
The following sections are written primarily for a technical audience with the scenario in mind of system administrators looking to protect their organisations’ domain names from being spoofed.
These measures aren’t 100 % effective because (1) they rely on Mail Transfer Agents (MTAs) actually making use of these countermeasures and (2) cyber security is a cat-and-mouse game - attacks are always evolving.
We’ve chosen to focus more on the implementation process and some relatively unknown issues, rather than in-depth technical information / explanations for which many other resources exist.
Writing content on a subject this broad that should be able to apply to any given organisation, domain name, name server, MTA, email client, etc is fairly difficult so please let us know if we’ve overlooked anything.
Spoofing countermeasures
We will be covering the following spoofing countermeasures which we’ve linked so you can jump to each section:
SPF
Sender Policy Framework (SPF) is a mechanism that is applied to a domain, is widely adopted, and is very effective at mitigating spoofing of the transit- / SMTP-level 5321.MailFrom (AKA “envelope”) address.
There are a few steps that are critical to doing so successfully.
Step 1 of 5: Discovery of domain names
Any domain name can be used for sending email so anti-spoofing policies should be published for all registered domain names to ensure that only the owners’ trusted systems can do so.
However, IT aren’t always aware of every single domain name that the organisation has registered. For example, a founder may have registered domain names when they started the business but only informed IT of the ones that they want to have a web site, email, etc. For another example, a marketing department may have registered a domain name for an advertising campaign but not informed anyone else.
So, it’s a good idea to double-check with domain name registrar account admins, management, web developers, marketing, etc to ensure that IT have a complete list of domain names to work with.
Step 2 of 5: Discovery of email services
Similar to the discovery of domain names above, IT may not be aware of every single email service that has been setup to send emails as the organisation’s domain names (for example, the web server may send emails for contact forms) so it’s a good idea to double-check with anyone or anything that may be involved to get a full picture of email usage.
You’ll be looking for:
Whether the email service actually sends emails as your domain names. Some simply send emails using their own domain names to avoid these issues.
What public IP addresses the email service uses to send emails.
Fortunately, in this case, there are technical systems that can assist with discovery such as a DMARC reporting-only policy which we’ll cover below.Whether any providers offer SPF policies that can be included in yours.
You can find most of this out by checking the headers of emails that have already been sent, checking the provider’s documentation, and asking the provider’s support.
If any email services are configured to forward emails from external senders to external recipients then you may want to reconsider this setup as these scenarios will be fraught with problems but, as a workaround, it’s important to ensure that those email services use the Sender Rewriting Scheme (SRS), if available.
Step 3 of 5: Creating and validating a policy
Now that you’ve identified which domain names are being used for email and which services are doing so, you’ll need to create SPF policies.
The design of an SPF policy can be easy to get wrong - I have personally seen multiple Email Service Providers (ESPs) as large as Outlook.com get them wrong on live email systems. So, it’s helpful to start with a generator such as MxToolBox’s.
As you can see above, if emails are sent as example.astrix.co.uk from the web server (1.2.3.4), on-premises email server (5.6.7.8), and Mailchimp and absolutely nothing else then, respectively, the SPF policy would be as follows:
v=spf1 a ip4:5.6.7.8 include:servers.mcsv.net -all
You should try to keep the entries in the SPF policy to systems that you really trust to be secure - systems that have trusted operators, that are regularly patched, that have strong access control, that don’t share public IP addresses without email domain authorisation that then only allow you to send emails as that domain name, etc. Otherwise, a system can be used to “legitimately” spoof your domain name.
If you’re confident that you’ve accounted for every single email service that’s sending emails as your domain name, it’s good to use the fail qualifier with the all mechanism (“-all”) which means that all unlisted addresses should be distrusted. If you’re not, it might be good to temporarily use the softfail qualifier with the all mechanism (“~all”) which means that all unlisted addresses should be treated as suspicious.
Once you’ve created an SPF policy, it’s important to use a validator such as ORF Fusion’s / Vamsoft’s to ensure that it’s syntactically correct, that the collective DNS lookups are limited to 10 (refer to RFC 7208 | 4.6.4), etc.


Step 4 of 5: Publishing the policy
Once you’ve created valid SPF policies, you’ll need to publish them so that MTAs can publicly reference them. Doing so involves entering the SPF policy as the value of a TXT Resource Record (RR) in the authoritative name servers for the domain name used in the email addresses. Following the above example, the DNS RR would be:
example.astrix.co.uk. IN TXT "v=spf1 a ip4:5.6.7.8 include:servers.mcsv.net -all"
Step 5 of 5: Validate the setup
Once the SPF policies are published, it’s a good idea to send some test emails and check the headers to ensure that it is working correctly.
Received-SPF: Pass (sender SPF authorized) identity=mailfrom; client-ip=5.6.7.8; helo=example.astrix.co.uk; envelope-from=test@example.astrix.co.uk; receiver=test@astrix.co.uk
DMARC
Domain-based Message Authentication, Reporting & Conformance (DMARC) is a mechanism that is applied to a domain, is growing in adoption, and is very effective at mitigating the spoofing of both from addresses — transit- / SMTP-level 5321.MailFrom (AKA “envelope”) and content- / MIME-level 5322.From (AKA “header”) — by making usage of the results of SPF and/or DKIM checks. Also, it can specify actions for MTAs to take in various scenarios, etc.
The implementation of DMARC is very similar to that of SPF so we’ll be omitting some detail as it’s already been covered above.
Step 1 of 6: Discovery of domain names
It’s important that all of your domain names are protected against spoofing attacks, including ones that you’re not using for email.
Step 2 of 6: Publish and validate reporting-only policies
DMARC can be deployed in a reporting-only mode where it will instruct supporting MTAs to email reports to you for analysis without affecting email delivery. Obviously, this is invaluable when you need to discover how email services are currently handling emails from your domain names.
So, for each domain name, you’ll need to create a DNS RR for the policy in the following format:
_dmarc.<domain name>. IN TXT "v=DMARC1; p=none; rua=mailto:<email address>; ruf=mailto:<email address>; fo=1;"
For the previous example, the DNS RR would be as follows:
_dmarc.example.astrix.co.uk. IN TXT "v=DMARC1; p=none; rua=mailto:dmarc.reports@astrix.co.uk; ruf=mailto:dmarc.reports@astrix.co.uk; fo=1;"
Once these DNS RRs / policies are published, it’s a good idea to use a validator like dmarcian’s to ensure that they are syntactically correct.
It’s also a good idea to create report authorisation DNS RRs to ensure that both the aggregate and forensic report emails can be delivered. These are in the following format:
<policy reporting domain name>._report._dmarc.<receiving reporting domain name>. IN TXT "v=DMARC1"
For the previous example, the DNS RR would be as follows:
example.astrix.co.uk._report._dmarc.astrix.co.uk. IN TXT "v=DMARC1"
Step 3 of 6: Ensure email services are compliant
This is a bit different to SPF due to domain name / identifier alignment and how different services send emails in different ways. Basically, both from addresses need to use the same domain name in order for the checks to pass. The DMARC reports will assist with this discovery but your best bet may be to manually check the headers of emails actually sent from the email services.
If you find that the domain names / identifiers don’t align then you’ll need to get the system changed so that they do.
Step 4 of 6: Analyse reports
If a supporting email system receives email from a domain name with a DMARC policy that provides email addresses for reporting then they will:
Once per day, generate and email the aggregate reports for each domain name in XML format (as per the specification). The reports are human-readable but if you have many domain names that are widely used then management of these reports can be quite cumbersome so many services exist to automate and ease this process (refer to https://dmarc.org/resources/products-and-services/#Analytics).
As soon as a received email fails a check, email the forensic report (policy results and all headers) in plaintext format. Although, not many ESPs actually support this for privacy and resource reasons.
It’s a good idea to wait at least few days or, if your priority is to minimise disruption, even weeks or months to collect these reports because, for example, your marketing email service may be configured to only send a newsletter once per month which would otherwise be missed in these reports.
In the following example, an email was sent to a Gmail email account from the on-premises email server with a valid SPF policy and DKIM signing so the SPF check passed, the DKIM check passed, and the domain names / identifiers aligned so the DMARC check passed.
  <record>
    <row>
      <source_ip>5.6.7.8</source_ip>
      <count>1</count>
      <policy_evaluated>
        <disposition>none</disposition>
        <dkim>pass</dkim>
        <spf>pass</spf>
      </policy_evaluated>
    </row>
    <identifiers>
      <header_from>example.astrix.co.uk</header_from>
    </identifiers>
    <auth_results>
      <dkim>
        <domain>example.astrix.co.uk</domain>
        <result>pass</result>
        <selector>hmailserver-1</selector>
      </dkim>
      <spf>
        <domain>example.astrix.co.uk</domain>
        <result>pass</result>
      </spf>
    </auth_results>
  </record>
In the following example, an email was sent to a Gmail email account from the web server with a valid SPF policy and no DKIM signing so the SPF check passed, the DKIM check failed (as signing wasn’t used), but the domain names / identifiers did not align so the DMARC check failed. In this case, the transit- / SMTP-level 5321.MailFrom (AKA “envelope”) address would need to be changed from @bestwebservers.com to @example.astrix.co.uk so that they align and vice versa.
  <record>
    <row>
      <source_ip>1.2.3.4</source_ip>
      <count>1</count>
      <policy_evaluated>
        <disposition>none</disposition>
        <dkim>fail</dkim>
        <spf>fail</spf>
      </policy_evaluated>
    </row>
    <identifiers>
      <header_from>example.astrix.co.uk</header_from>
    </identifiers>
    <auth_results>
      <spf>
        <domain>bestwebservers.com</domain>
        <result>pass</result>
      </spf>
    </auth_results>
  </record>
Step 5 of 6: Create and publish custom policies
Once you’ve analysed a reasonable number of DMARC reports and ensured that your email services are compliant, you should create a non-reporting-only policy to start combating spoofing.
As with the SPF policy, DMARC policies can be easy to get wrong so it’s helpful to start with a generator such as dmarcian’s.
Depending on how confident you are that you’ve covered all bases, it may be a good idea to start with a small policy application percentage, analyse further reports, and scale up over time.
Our preferred DMARC policy is as follows:
"v=DMARC1; p=reject; sp=reject; adkim=s; aspf=s; fo=1; pct=100; rua=mailto:<email address>; ruf=mailto:<email address>"
Keep in mind that some MTAs don’t respect these policies so behaviour may not be quite what you’re expecting. For example, Office 365 interprets “reject” as “quarantine” (refer to https://docs.microsoft.com/en-us/office365/securitycompliance/anti-spoofing-protection#understanding-changes-in-how-spoofed-emails-are-treated).
Once you’ve created the report, you’ll need to publish it in the same manner as step 2.
Step 6 of 6: Validate the setup
Once the restrictive DMARC policies are published, it’s a good idea to send some test emails and check the headers to ensure that they are working correctly.
Authentication-Results: spf=pass (sender IP is 5.6.7.8) smtp.mailfrom=example.astrix.co.uk; astrix.co.uk; dkim=pass (signature was verified) header.d=example.astrix.co.uk;astrix.co.uk; dmarc=pass action=none header.from=example.astrix.co.uk;compauth=pass reason=100
Security Awareness Training
As invaluable as technical systems are, none are infallible so it’s important to reinforce the last line of defense: users.
Security awareness training services aim to, for example:
Intentionally phish users with bait via email, phone call, and/or USB devices and report back on who’s most vulnerable for further training.
Use computer-based training to train users on the red flags of malicious email and how to deal with them, the many forms of social engineering, how to create secure passwords, and much more.
Get users to read and formally acknowledge security policies.
If these types of services are deployed effectively, users should learn to be skeptical, report potential issues, and seek verification via alternate channels when it comes to spoofed emails, among many other best practices. Also, once these types of services are in place and used then it’s safer to disable password expiry.
KnowBe4 is a great example of such a service.
Also, the NCSC has published 10 steps regarding this (refer to https://www.ncsc.gov.uk/guidance/10-steps-user-education-and-awareness).
Secure Email Gateway
Some attackers simply sidestep technical mitigations by using a legitimate email service (valid SPF, DKIM, DMARC, SSL / TLS certificates, etc) but for nefarious purposes. For example:
Display name spoofing: An attacker may create an email account using a trusted entity’s name for a specific attack.
This is particularly effective in email apps on mobile devices because, by default, they tend to hide the sender email address so “Ben Hooper <benhooperatastrix@gmail.com>” would simply display as “Ben Hooper”.Cousin / lookalike domain names: An attacker may register a domain name that looks very similar to that of a trusted entity for a specific attack.
Cyrillic Internationalized Domain Name (IDN) homograph / homoglyph attacks were a great example of this. The following are two completely different domain names but you probably wouldn’t notice the difference (in the second example, the first “e” isn’t a normal one).
example.co.uk
еxample.co.uk
Mitigating these kinds of attacks requires a system with intelligence - a Secure Email Gateway / advanced email filtering service. Most MTAs offer some kind of basic filter / protection but it’s almost always insufficient.
The Email Laundry and Mimecast are some great examples of these kinds of services and the protections they offer go far beyond what I’ve talked about here.
Credential Protection
If an attacker can gain access to an email account then they can “legitimately” spoof that sender email address, in addition to having access to everything else that those credentials are authorised for (past sent emails, future received emails, calendar, other mailboxes, etc).
These days, an email account’s credentials can be and frequently are obtained fairly easily via phishing, data breaches, the deep / dark web, etc so some good mitigations for this are:
Use Multi- / Two-Factor Authentication (MFA / TFA).
MFA is a must nowadays and mitigates these types of attacks by requiring an additional authentication factor (something you know such as a password, something you have such as a Universal 2nd Factor (U2F) device or smartphone, something that is inherent to you such as your fingerprint or face, or, arguably, somewhere you are). Having said that, some methods such as Time-based One-Time Passwords (TOTPs) can still be phished so don’t let your guard down!
The NCSC has published some good advice on this topic (refer to https://www.ncsc.gov.uk/guidance/setting-two-factor-authentication-2fa).Use secure connections.
There’s a chance that the connections from your email clients aren’t encrypted or aren’t using publicly-trusted SSL / TLS certificates in which case the credentials and data are susceptible to interception and man-in-the-middle (MITM) attacks (beware of public Wi-Fi in particular). With organisations such as the fantastic Let’s Encrypt issuing publicly-trusted Domain-Validated (DV) certificates for free, there’s really no reason not to do so anymore.
If you’re using a cloud service such as Office 365 / Exchange Online or G Suite then the chances of this are significantly lower as the service provider takes care of the encryption and the email clients are usually automatically configured with secure settings.Use password managers.
Most password managers, in addition to securely storing credentials and generating secure passwords by default, offer a web browser extension that will automatically paste / submit your credentials on web sites. If you can get your users into the habit of using these then they’re less likely to manually enter their credentials on phishing web sites.
The NCSC agrees with this too (refer to https://www.ncsc.gov.uk/blog-post/what-does-ncsc-think-password-managers).
Dashlane, LastPass, and 1Password are great examples of these types of services.
We love it when a solution is more secure and more convenient!Use reporting services.
Some services have been created to inform users or organisations when their credentials have appeared in data breaches (such as Have I Been Pwned? which we covered in our previous blog post “Stay aware of whether data breaches affect you”) or on the deep / dark web (such as ID Agent).
DKIM
DomainKeys Identified Mail (DKIM) is a mechanism that is applied to a specific domain and email service, has some adoption, and is somewhat effective (only really as additional assurance and in combination with DMARC) at mitigating the spoofing of the content- / MIME-level 5322.From (AKA “header”) address. Also, it is very effective at mitigating the modification of content in transit.
There are a number of steps that are critical to doing so successfully.
Most email services automate the generation and rotation of keys and use non-customisable selectors so if this is the case then you can skip steps 2, 3, and 6.
Step 1 of 7: Identify email usage
You’ll need to check:
Whether each email service even supports DKIM signing.
Whether any of your post-DKIM signing MTAs modify emails in-transit. This is important because if this is done then it will probably result in a different hash and, therefore, a failure of the check which can result in delivery failure.
For example, Office 365 may be configured with a send connector which routes outbound email via a service that modifies email content in order to append email signatures for branding reasons (organisation’s standard email signature), security reasons (“This email has been scanned by <third-party email filtering service>”), etc.
Step 2 of 7: Generate keys
The NCSC advises using 2048-bit keys and there are various ways of generating them but we like using OpenSSL so if you can use that then the commands are as follows:
openssl genrsa -out DKIM_PrivateKey.pem 2048
openssl rsa -in DKIM_PrivateKey.pem -outform PEM -pubout -out DKIM_PublicKey.pem
If you open these PEM files in a text editor then you’ll see the respective keys.
It’s incredibly important to keep the private keys / files a secret because if they get compromised then the attacker could “legitimately” use your DKIM signing setup.
Step 3 of 7: Choose selector names
As DKIM signing is per-service and key rotation is advised (see step 6), it makes sense for selector names to reflect this so we like to name them “<service name>-<number>”. For example, “hmailserver-1”.
Step 4 of 7: Publish and validate public key(s)
If you have generated your own keys or the ESP has simply provided their public keys then you’ll need to create a DNS RR in the following format:
<selector name>._domainkey.<domain name>. IN TXT "v=DKIM1; k=rsa; p=<public key>"
For the above example, the DNS RR would be as follows:
hmailserver-1._domainkey.example.astrix.co.uk. IN TXT "v=DKIM1; k=rsa; p=MIIBIjANBgkqhkiG9w0BAQEFAAOCAQ8AMIIBCgKCAQEA3XiTbgbKkCPhz857UOGxjPVoYhSy98RbljVFCdQPmMXTX8NISYKUNQ4Pw4jzr7bQ/nh0ku/0lcm047lIn4RMAAPlM+6vJDqI7upiw8a6mSbSvxElvsvo2IzmgfONHOItm3yLil2YpBYkBfFWsss0QBdz1hQXCzgooBNEhFMY/nGbklXMXv9nEehjWT33WVWMq"
"VukFM3QJ1Yyi84aQq2IXCvSWcVtlgsNSJCsvoFAweSkNzjFRSmjkI2z0seYt5ddpco/EVkObprW1m7G3BkJv+ZLlN0s+wjNzGR38pFoCt4O/yJ6RKDmH8QPXXgySEl/GEd3yeAGPYDg5NLxS6l5YQIDAQAB"
Notice that there are two strings on two different lines. This is because, in Amazon Web Services (AWS) Route 53 and other DNS / name servers, strings have a maximum length of 255 characters so ones that are longer need to be split into seperate ones.
If the ESP has provided a selector and Fully Qualified Domain Name (FQDN) then you’ll need to create a DNS RR in the following format:
<selector name>._domainkey.<your domain name>. IN CNAME <ESP’s FQDN>.
Using a fictitious Office 365 tenant as an example, the DNS RRs would be as follows:
selector1._domainkey.example.astrix.co.uk. IN CNAME selector1-example-astrix-co-uk._domainkey.astrixexample.onmicrosoft.com.
selector2._domainkey.example.astrix.co.uk. IN CNAME selector2-example-astrix-co-uk._domainkey.astrixexample.onmicrosoft.com.
Once you’ve published the DNS RRs, it’s important to use a validator such as MxToolBox’s or mail-tester’s to ensure that it’s syntactically correct.
Step 5 of 7: Enable DKIM signing
Once the DNS RRs have been published, you’ll need to configure and enable DKIM signing on the service.
Step 6 of 7: Validate the setup
Once DKIM signing is active, it’s a good idea to send some test emails and check the headers to ensure that it is working correctly.
dkim-signature: v=1; a=rsa-sha256; d=example.astrix.co.uk; s=hmailserver-1; c=relaxed/relaxed; q=dns/txt; h=From:Subject:Date:Message-ID:To:MIME-Version; bh=47DEQpj8HBSa+/TImW+5JCeuQeRkm5NMpJWZG3hSuFU=; b=ImheFA0uSOq7XGczsDZSbCFfVTjgHhh3uwoSTrHhTjB8aTV2tWQYZi4Nof0GmdCeu2e1Ym0OJSl7P47sVCFthnEq/RLODrPNG4heqWk3/QIofv6IEPXwpHfcGvjT7pnwXXn7vaQBFbd6zVSAAsfbHMC/F30V0t5muCEu1Msjn/gzspYvWtZY58IdOGG0IWIEWbeZjJ8q+lI72ODZ6dUqGmbIWtk34qU7W0lhsKhKkJ+2gQRR23kOcdxjRs+36JQJKHT7G3E8uNw8oOxkoHIfJLUA7u1oYEFh669IRzAQWdmvrGbWBWmi9/QKTUHJ3e6Z3RrAi2jVuXCTVmpw00ni2A==
Authentication-Results-Original: mr23.theemaillaundry.net;dkim=pass (2048-bit key) header.d=example.astrix.co.uk header.i=@example.astrix.co.uk header.b="ImheFA0u"
Step 7 of 7: Schedule key rotation
It’s best practice to change DKIM’s keys periodically and the NCSC advises doing so every 12 months. The reason for this is because, for example, if a private key gets secretly compromised 6 months after it was implemented then it will only be compromised for the remaining 6 months, rather than for the duration of the entire email service which could be decades.
To do this, simply start from step 2 again.
S/MIME
Secure/Multipurpose Internet Mail Extensions (S/MIME) is a mechanism that is applied to a specific device, specific email client, and specific email account; has little adoption; and is somewhat effective (as with DKIM, only really as additional assurance) at mitigating spoofing attacks via digital signing. Also, it is effective at End-to-End Encryption (E2EE).
In our experience, S/MIME for anti-spoofing / digital signing is more trouble than it’s worth because:
Users aren’t used to this so it won’t mean much to them.
It is not available on some major email clients (for example, OWA / Outlook on the Web, Outlook for Android, Outlook for iOS, etc).
It causes problems with some major email clients (for example, attachments won’t display in Outlook for Android and iOS).
It requires the management and renewal of private keys.
It restricts functionality in Outlook for Windows as of the October 2018 update.
However, if these aren’t problems for you then there’s not really any harm in using this.
In the below guide, we’ll be using Comodo’s Free Secure Email Certificate and Microsoft Outlook.
Step 1 of 2: Obtain and install a certificate
In Internet Explorer or Mozilla Firefox (these web browsers are required for completing the CSR process), browse to https://www.comodo.com/home/email-security/free-email-certificate.php.
Under "Free Secure Email Certificate", select "Sign Up Now" then allow the web site to perform digital certificate operations on your behalf.
Complete and submit the application.
Allow the web site to perform digital certificate operations on your behalf again.
Wait for the certificate issuance email.
In Internet Explorer or Mozilla Firefox, browse to https://secure.comodo.com/products/!SecureEmailCertificate_Collec2 and submit the email address and given password.
Allow the web site to perform digital certificate operations on your behalf again.
The S/MIME certificate should now be installed in the personal certificate store.
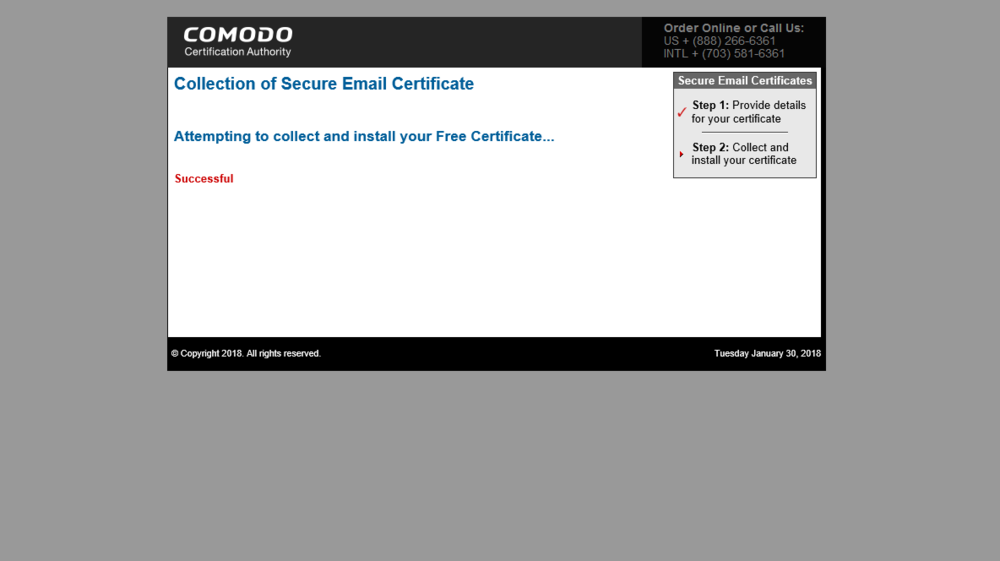
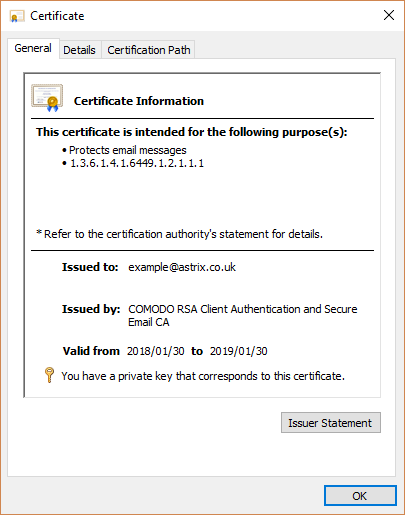
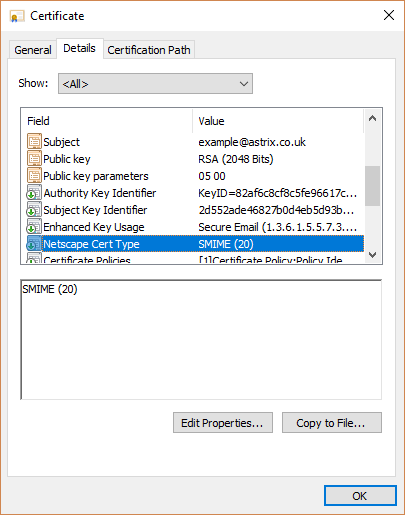

If you intend to re-use this certificate on other devices, you will have to use certmgr.msc to export this certificate to a password-protected PFX file.
Step 2 of 2: Configure the email client to use digital signing
In Microsoft Outlook.select "File" | "Options" | "Trust Center" | "Trust Center Settings..." | "Email Security".
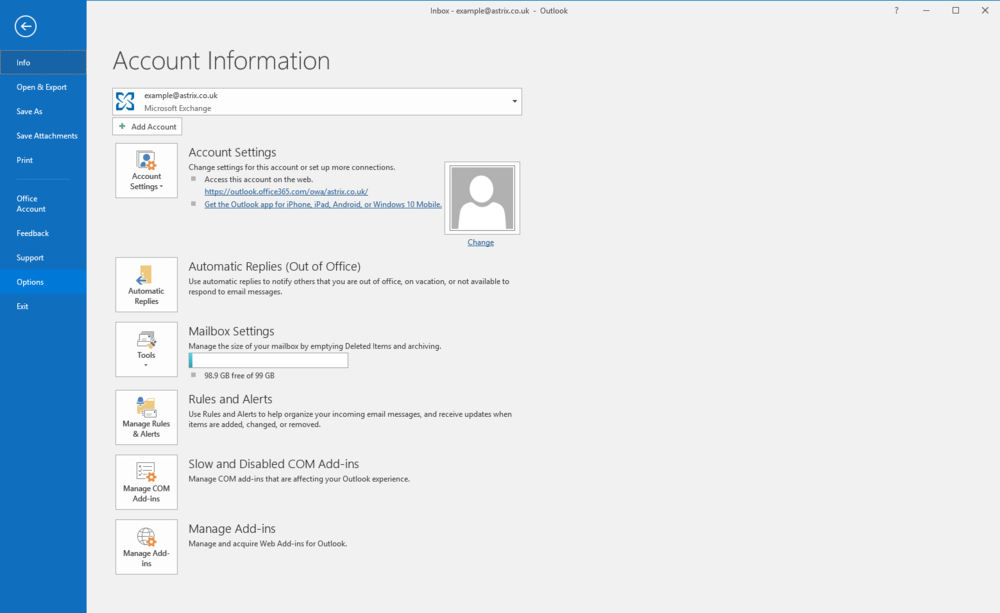

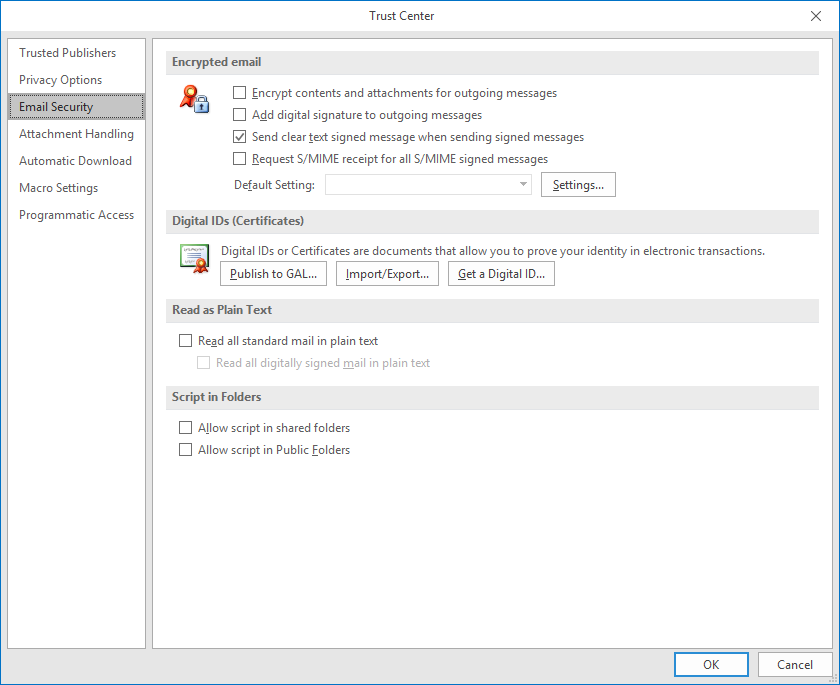
Select "Settings" (this should automatically detect and set the certificate) and select "OK".
Check "Add digital signature to outgoing messages".
Outgoing emails should now be digitally signed.
If Windows Security prompts asking whether CryptoAPI Private Key is allowed to access your private key then select "Yes".
Sign-off
If you’ve managed to read this far, well done and thank you. Hopefully this has been of some help to you.
If you want to be notified of our future posts, feel free to sign up to our newsletter.
Until next time!


